Pomodoro Timer Based on ESP32 with E-Ink Display
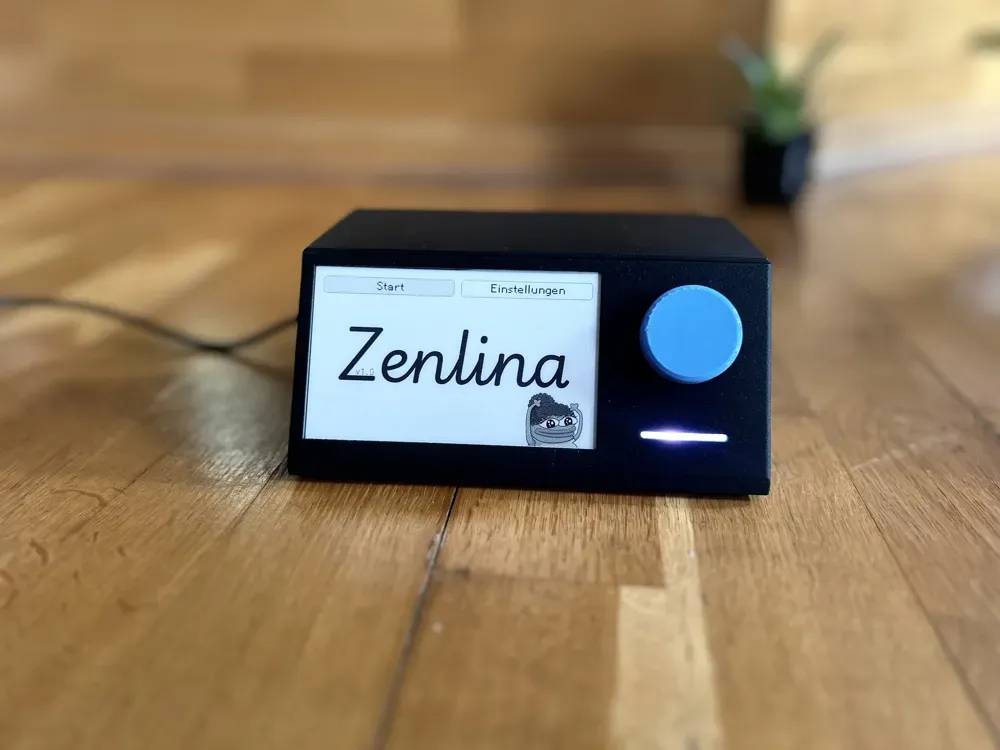
This is a Pomodoro timer based on ESP32 with a 4.26-inch black-and-white E-Ink display, featuring a rotary encoder for input. The timer helps manage work and break intervals efficiently.
Pomodoro Timer Based on ESP32
The Pomodoro Technique is an effective time management method that uses intervals of work and rest to improve focus and productivity. This timer is based on ESP32, featuring a 4.26-inch black-and-white E-Ink display and an input via a rotary encoder.
GitHub Repository:
This project is mostly open-source software, and the hardware is modular, requiring simple wiring.
Main Components:
- ESP32 (AZDelivery ESP32 NodeMCU, based on the ESP32-WROOM-32; an older model that might have been discontinued)
- Waveshare 4.26-inch E-Ink Display with a resolution of 800x480 (The choice of black-and-white E-Ink is due to its 0.3s refresh speed and static display, which doesn't interfere with your focus while working)
- KY-040 Rotary Encoder with buttons
- WS2812 RGB LED (can be replaced with a simple RGB LED)
- USB-C Interface (Type-C Female)
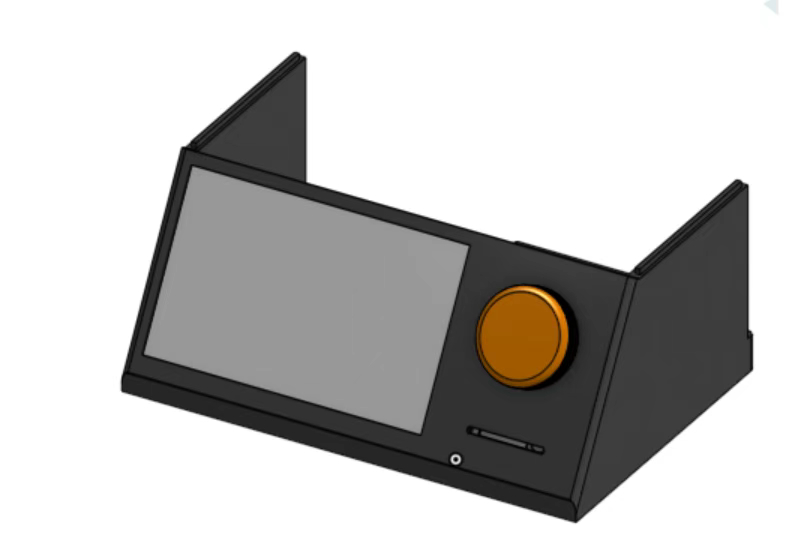
- 3D Printed Enclosure
- Some resistors and 0.1uF capacitors
Pin Connections:
KY-040 Rotary Encoder:
| Pin | ESP32 Pin |
|---|---|
| CLK | 32 |
| DT | 21 |
| SW | 14 |
4.26-inch E-Ink Display:
| Pin | ESP32 Pin |
|---|---|
| BUSY | 4 |
| RST | 16 |
| DC | 17 |
| CS | 5 |
| CLK | 18 |
| DIN | 23 |
LED (WS2812):
| Pin | ESP32 Pin |
|---|---|
| DIN | 25 |
Software:
The software is written in C++ using the Arduino framework, and the project is managed with PlatformIO. It relies heavily on the GxEPD2 library. For more details, please refer to the GitHub repository.
3D Printed Enclosure:
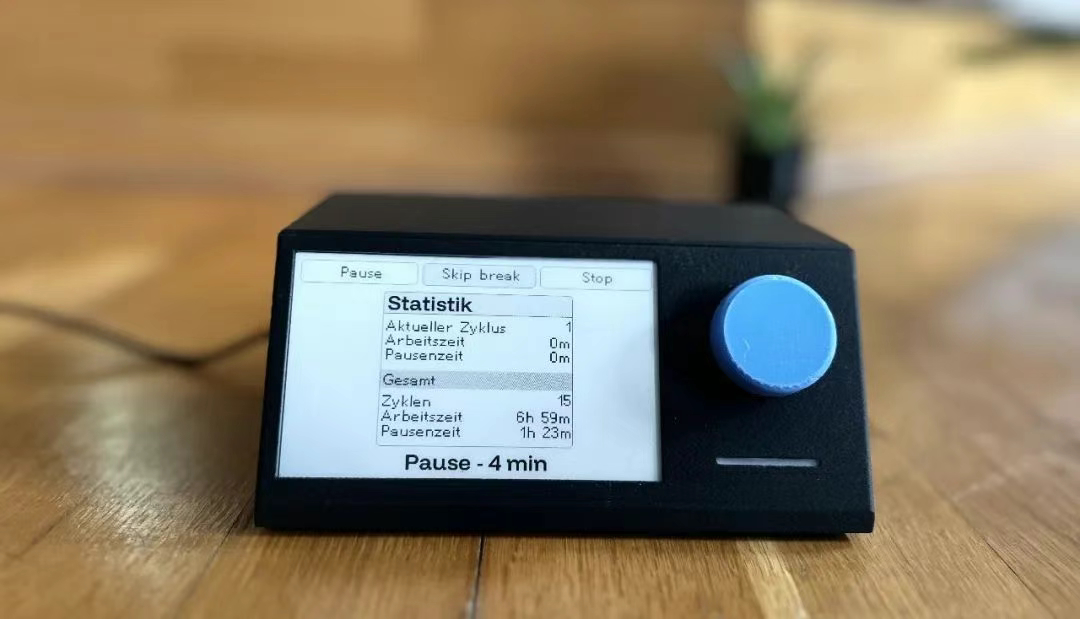
How It Works:
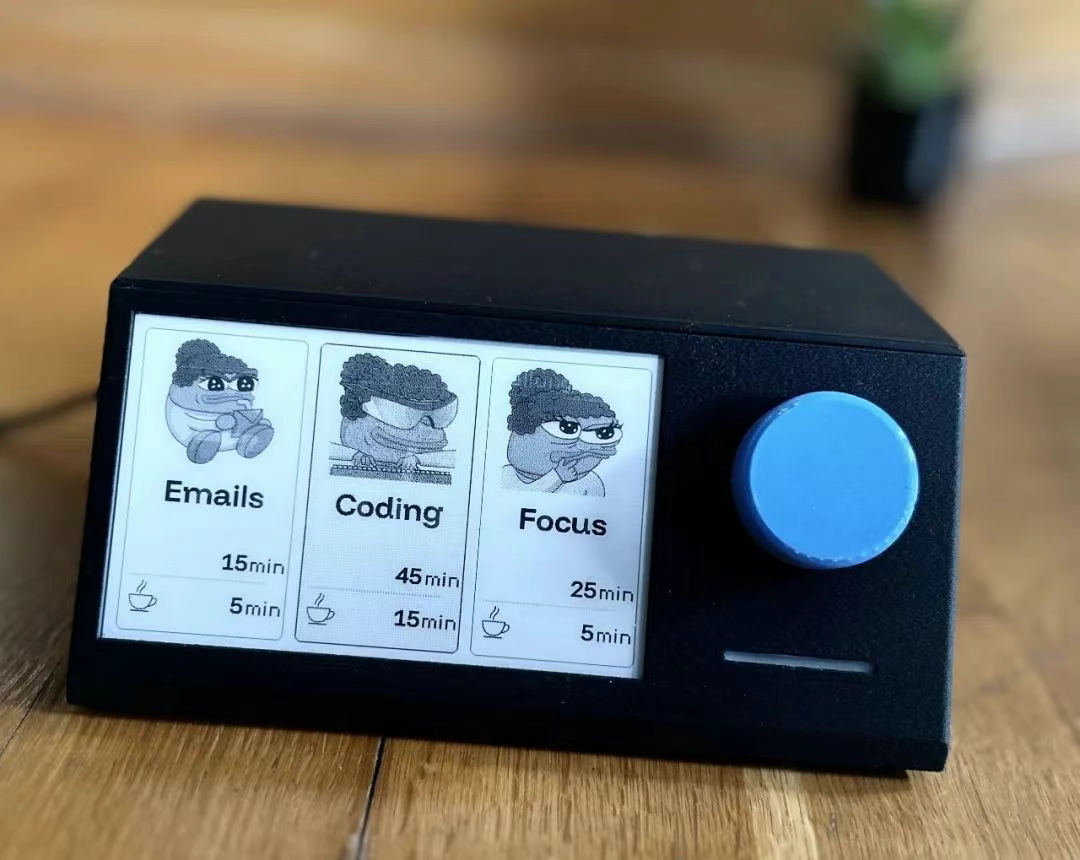
Upon starting the device, you can adjust settings or enter the preset selection mode. From there, you can choose from three predefined timer modes.
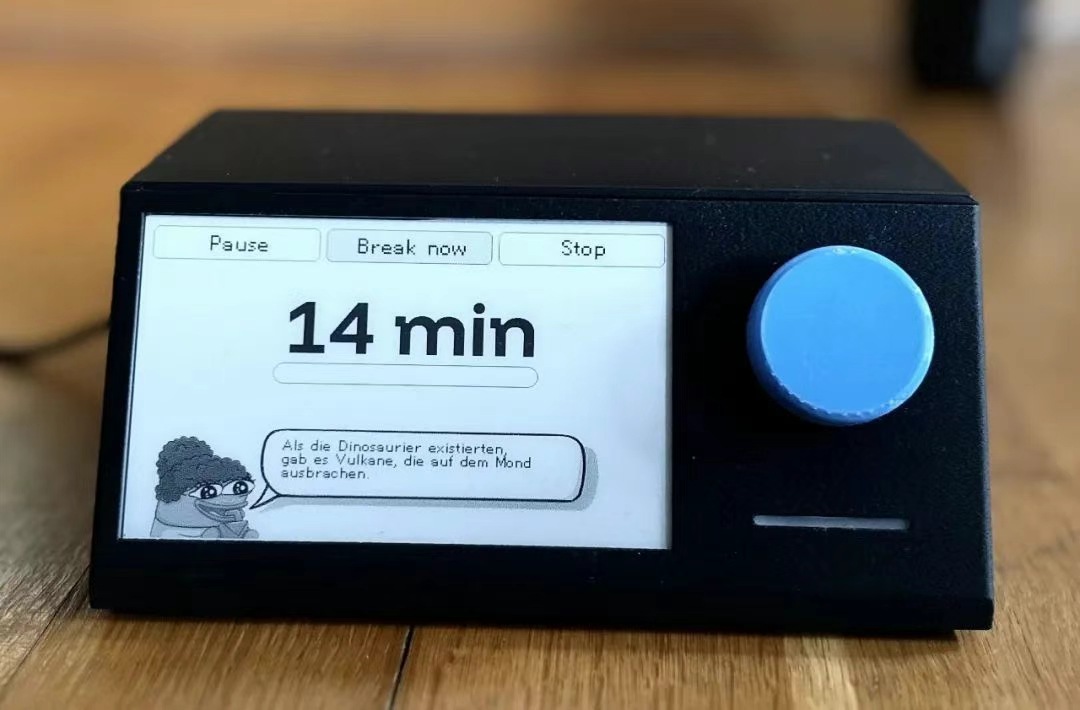
The timer will then start and notify you when the time is up (by flashing the LED and showing a message on the screen). You can continue working (though not recommended), then start your break.
During the breaks, you can check some statistics. After a few iterations (default is 4), your break time will be longer, giving you time to recover.
Share this article
Comments
0Please sign in to post a comment.
No comments yet.